Hubert's new launcher


Front view >

I was inspired to build a new launcher after I saw a nice design at the 2001 NM state science olympiad in Socorro, NM. This launcher, built by Steve Welch, had been in use for years, and its construction was extremely simple and robust. It was made out of plywood and bits of 2x4. Two hinges with an opening filed out held down the bottle, and the hinges were in turn held closed by a doorlatch. Pull a string that is tied to the latch handle and off it goes.

I told my friend Gordon McDonough (of the Interplanetary Water Rocket Society fame) about this, and he remarked that he had rockets where the fins extend below the bottle neck. I therefore made my version not flat, but upright and such that the top part has the same diameter as a 1-liter bottle.

I started with a piece of cedar 4x4 fencepost, and turned down the top to this diameter. Next were the hinges - I had a pair of brass ones that fit the job. Then I carved out space for the rubber stopper, and 1/2" CPVC elbows and stuff.

The trigger string comes out from a hole through the block; It is on the same side as the plumbing.
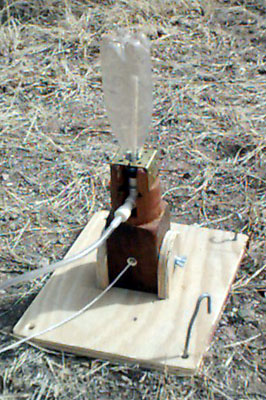
Back view >

The brass hinges are held down by a strap hinge whose end is bent over to form a hook. In the picture you can just see the bent-over piece, and a strip of oak screwed to the upper half of the hinge. The oak strip forms a lever using the strap hinge pin as a fulcrum. A string comes through a hole at the other end of the oak strip, and goes through a hole in the cedar block. Pull the string, the strap-hinge hook releases the brass hinges and voila. The whole strap hinge and oak piece fit in a recess carved in the cedar block to stay inside the liter-bottle diameter.

The cedar block is mounted between two plywood bits with a big carriage bolt with a wing nut. This allows you to pitch the launcher, and to fold it flat for storage. Note that base plywood has holes at the corners for tentpegs.
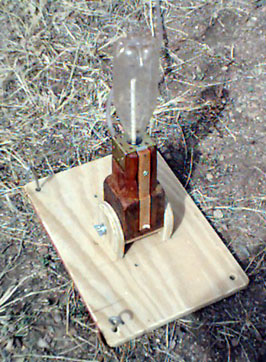
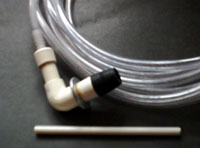
The plumbing part is not attached to the launcher block. I begin with a cap cemented to a short piece if pipe (all this is 1/2" CPVC). In the cap I drill a hole so I can push a nylon hose barb halfway in. Then I use 5-minute epoxy to glue the hose barb into place. The tube is short enough so I can use a toothpick and make sure the space between the barb and the inner tube wall is filled with epoxy. I make a unit like that for both ends. I have a big washer that just slips over the tube (with some filing), and it gets captured tightly between the cap and the elbow. This washer is what supports the force of the rubber stopper - it rests on a ledge in the block.

The white plastic tube can be pushed into the rubber stopper before launch. When the water rocket is ready for launch, the other end of the tube will be above the water level, so that (almost) no water flows back into the system. This tube usually come loose during launch. By the way, a cheap ballpoint pen provides a tube of the right size.


Plumbing ^


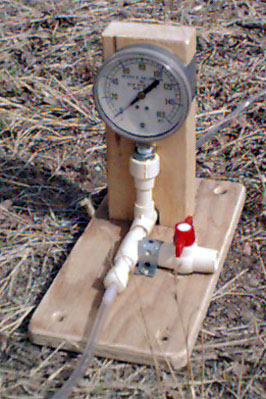
In-line safety unit >

I built a separate unit that I insert in the hose, close to the bicycle pump. This unit has a big old pressure gauge on it, as well as a pressure-relief valve. Over the years, there have been a few instances where something goes wrong after a bottle is already pressurized, and you have to fool with things under 100 psi pressure. Not safe. The pressure-relief valve is a nice thing to have close by, and the whole unit is a nice addition, especially if you work around a lot of children. It is made out of the same 1/2" CPVC parts, and 1/4" nylon hose barbs.
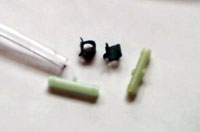
I use 1/4" plastic hose, with nylon hose barbs and these miniature spring clamps. This is easy to (dis)-assemble in the field. All you need is a pair of pliers to squeeze open the clamps and then you can pull off the hose. Without the clamps, the performance of the barbs is marginal at 100 psi; with the clamps, no problem.
More plumbing details


Thanks to Gordon for editorial comments.
Last update 23 January 2004 - Hubert van Hecke
back
back to mrscience